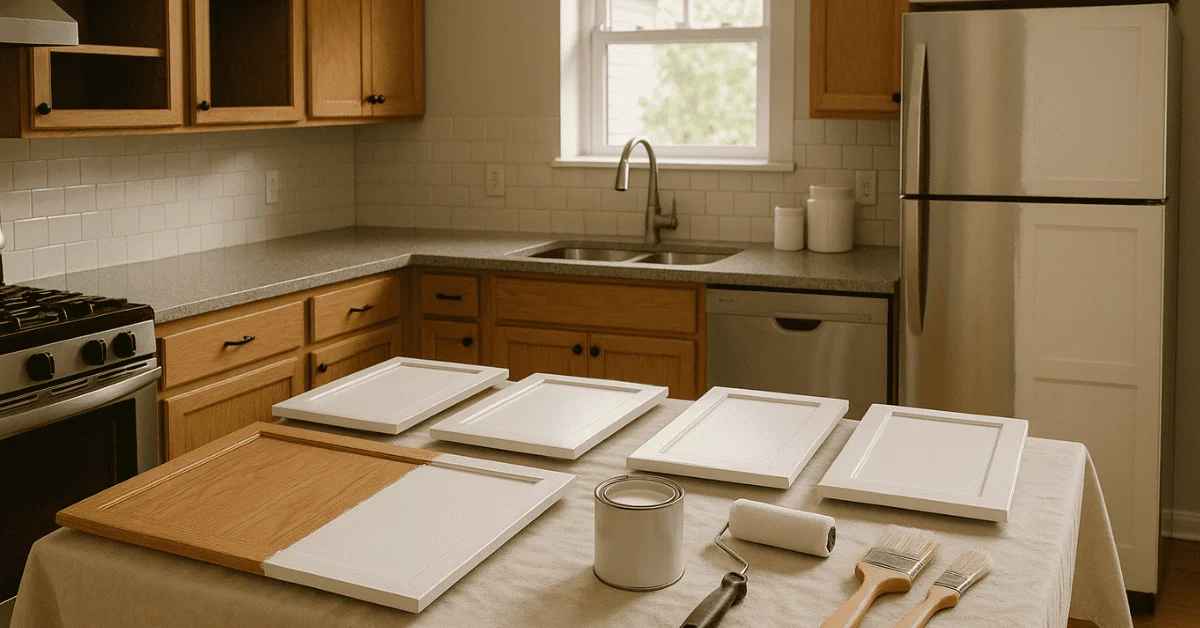
Imagine walking into your kitchen each morning and feeling a renewed sense of joy every time you open a cabinet sounds dreamy, right? Learning how to paint kitchen cabinets yourself is the secret to transforming that daydream into reality. With a few simple steps, basic tools, and a dash of creativity, you’ll give your space a fresh, personalized look that stops guests in their tracks.
No need for big budgets or hired help this project fits neatly into a weekend and leaves plenty of time for your favorite coffee breaks in between coats. In just a couple of afternoons, you’ll move from tired and dated to bright and modern, all while gaining the satisfaction that comes with tackling a DIY win. Let’s roll up our sleeves and get started!
Table of Contents
Why Paint Kitchen Cabinets Yourself
Tackling how to paint kitchen cabinets isn’t just about freshening up your space it’s a chance to save money, flex your creativity, and turn a weekend into a proud DIY victory.
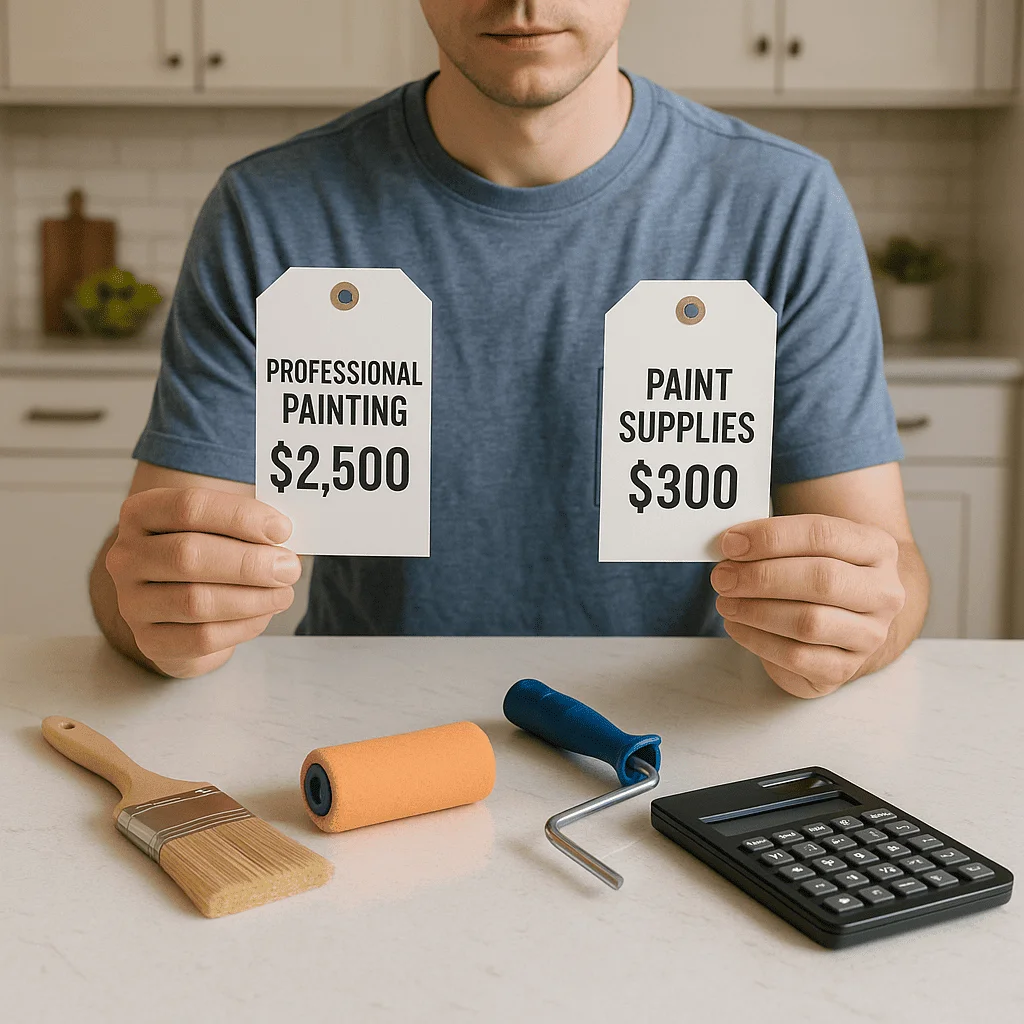
Save Big vs. Hiring Pros
Professional cabinet refinishers can quote hundreds even thousands of dollars. By rolling up your sleeves, you’ll cut labour costs entirely. A gallon of quality cabinet paint and primer typically runs under $60, and most kitchens need two to three gallons. Even after factoring in sandpaper, brushes, and tape, you’ll likely spend a small fraction of what a pro would charge, making this one of the most budget-friendly home upgrades you can do.
A Weekend Project That Fits Your Schedule
Whether you’re carving out a Saturday afternoon or spreading it over two evenings, a simple cabinet makeover on a budget is absolutely doable. Plan for about 2–3 hours per coat (including dry time) and you can finish the bulk of the work in a single weekend. Working in stages doors one day, drawers the next lets you cook in your kitchen most of the time and avoids that overwhelming “out-of-service” feeling.
Your Kitchen, Your Rules
Painting your own cabinets means you call the shots on every detail. Want a soft matte finish in creamy white? Go for it. Dreaming of two-tone shaker style cabinets with a pop of navy? You’ve got the power. This hands-on approach lets you experiment with trending hues, mix and match hardware, or even add a subtle glaze for depth. No back-and-forth emails with contractors just pure, unfiltered creative control.
Quick Tips to Get Started
- Set aside a clear weekend block. Even if you only tackle prep one evening and painting the next, chunking the work makes it feel less daunting.
- Gather your basics. A foam roller, angled brush, primer, and your chosen paint set the stage for smooth, even coats.
- Play with swatches first. Tape up small cabinet samples and live with them for a day to see how light changes your colour choice.
By painting your cabinets yourself, you’ll not only transform your kitchen’s look but also gain the confidence and satisfaction that comes with a successful DIY project pro-level results, without the price tag.
More Walls & Paint:
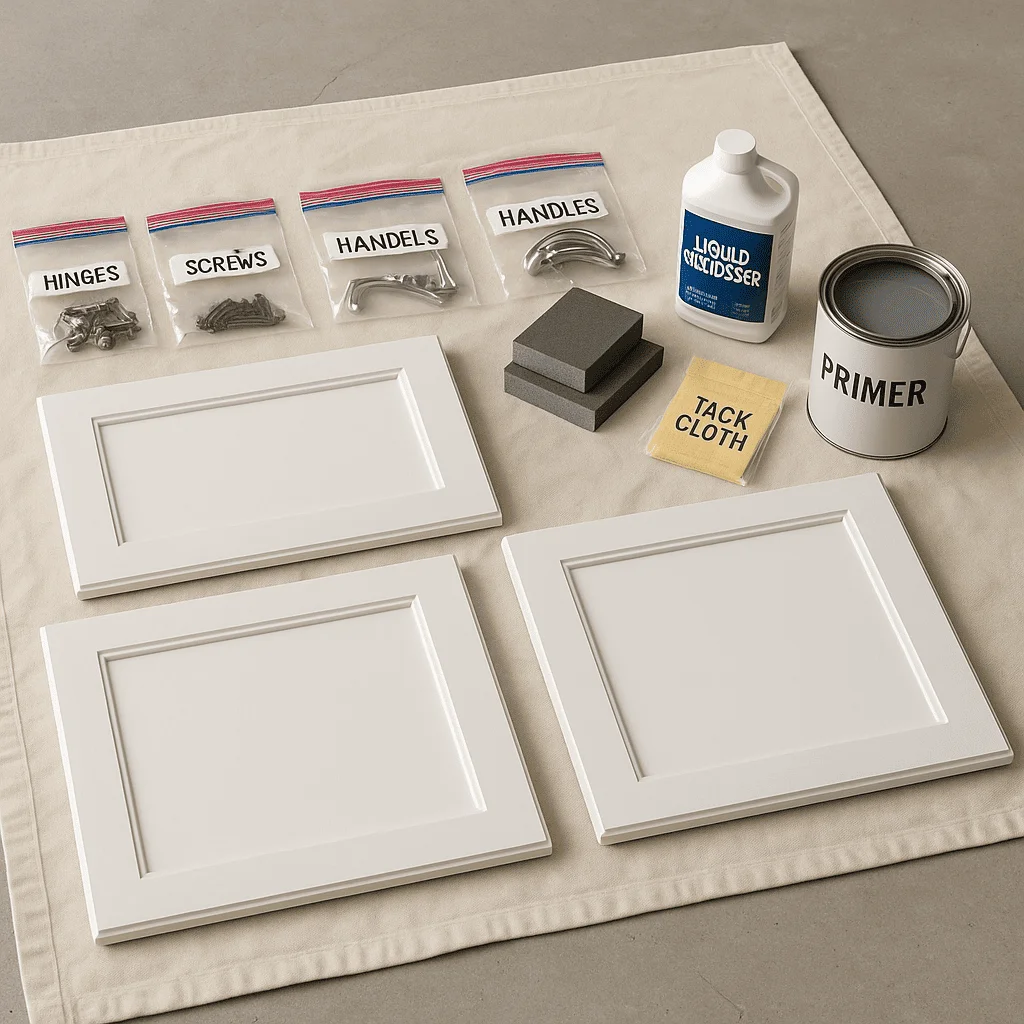
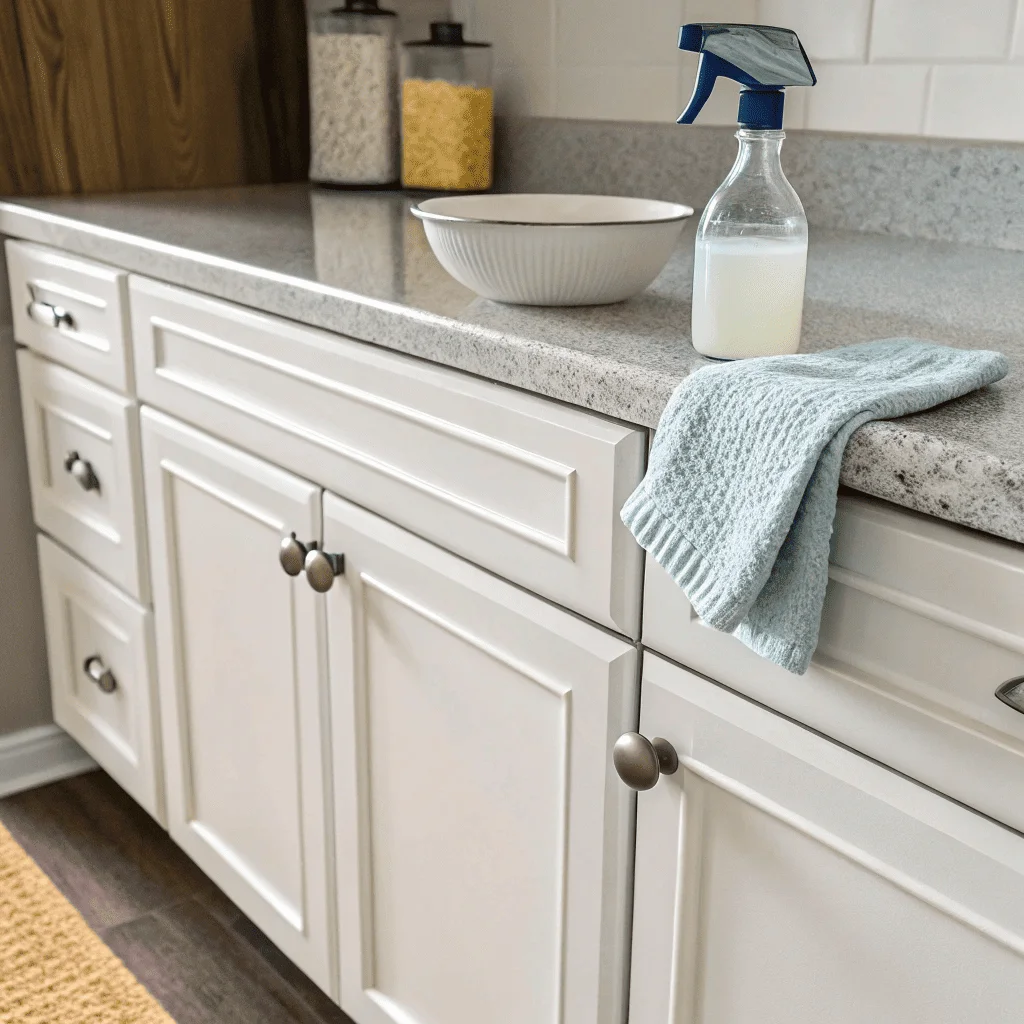
Tools and Materials You Will Need
Gathering everything before you start will save you frustrating mid-project trips to the store. Here’s what you’ll want on hand:
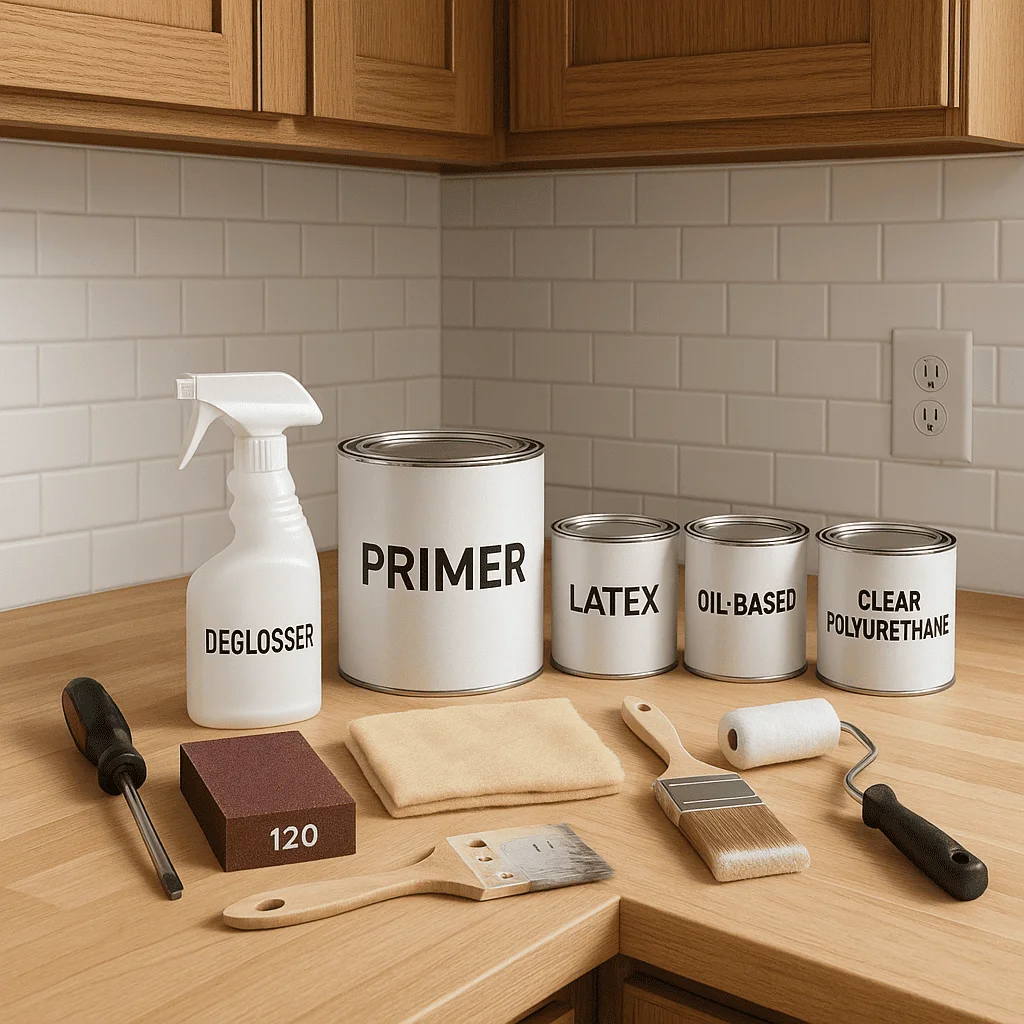
Essential Tools
Screwdriver: Remove doors, drawers, and hardware quickly keep a small container nearby for screws.
120-grit Sandpaper: Scuffs glossy surfaces so primer and paint adhere. Wrapping it around a block gives even pressure.
Liquid Deglosser: Skip heavy sanding wipe this on and surfaces are ready for primer in minutes.
Tack Cloth: Picks up fine dust after sanding or deglossing; one quick pass and panels are spotless.
Angled Brush & Foam Roller: Use the brush to get into corners and grooves; the foam roller delivers smooth, streak-free coverage on flat areas.
Optional Paint Sprayer: For larger jobs, a sprayer speeds things up and gives a factory-smooth finish just practice on scrap first.
Must-Have Materials
Primer: A bonding primer (e.g., Benjamin Moore Advance or Sherwin-Williams ProClassic) prevents peeling and ensures even color.
Paint Options:
Latex: Fast-drying, water cleanup, and resists yellowing.
Oil-Based: Ultra-durable and levels out nicely; requires mineral spirits for cleanup.
Chalk Paint: No sanding needed and creates a soft, matte finish.
Clear Polyurethane Sealer: A protective topcoat that guards against dings, grease, and daily wear.
Lining up your tools and materials in advance means smooth, uninterrupted work so you can focus on creating a flawless finish.
Choosing the Perfect Color and Finish
Picking the right shade and sheen can feel overwhelming, but a few smart steps will give you confidence even if you’re not an interior designer.
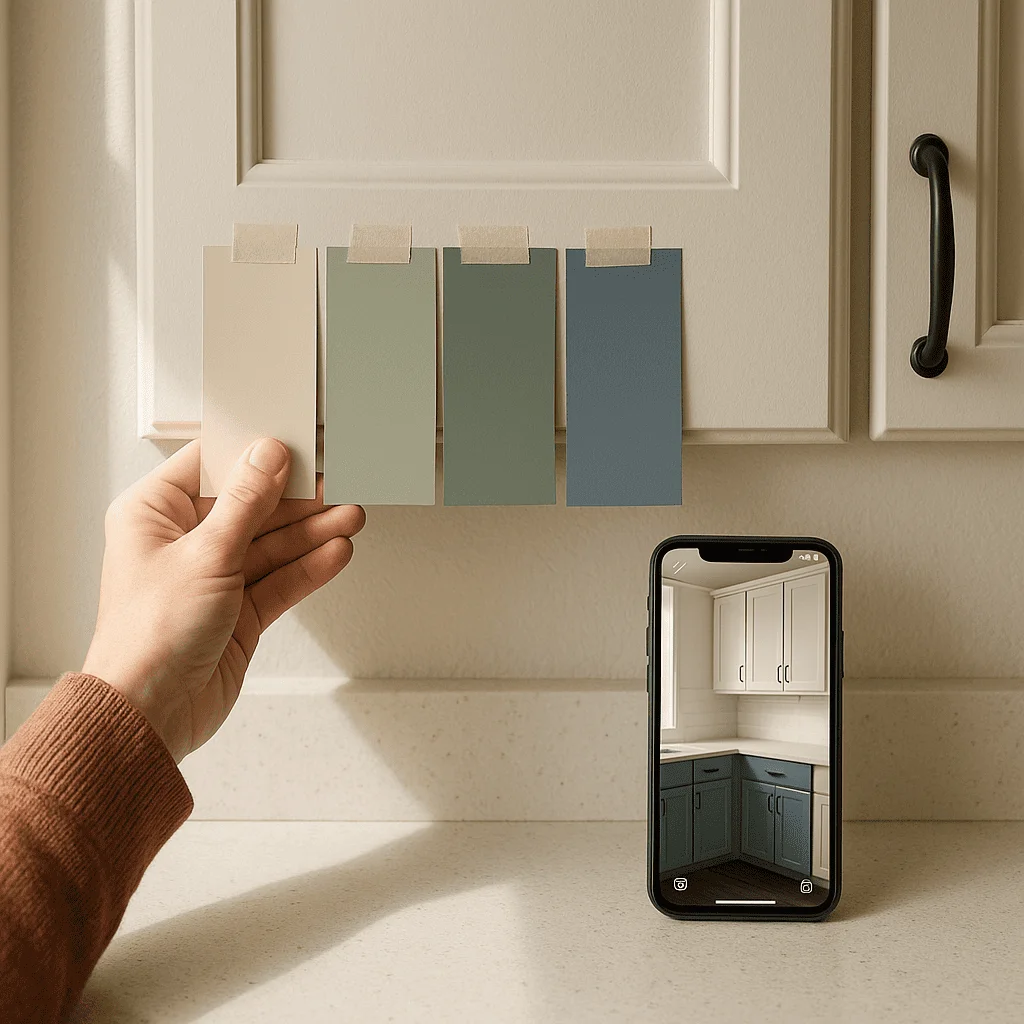
Preview Your Options
- Grab paint swatches or small sample pots and tape them to different cabinet doors. Live with them for a day morning sunlight vs. evening lamp light can change everything.
- Try a free digital visualizer app from paint brands. Snap a photo of your kitchen, upload it, and experiment with dozens of hues without lifting a brush.
Tap into Trending Hues and Complementary Palettes
- Neutrals like warm grays, soft whites, and greige remain timeless. If you crave a pop, consider deep navy or forest green on an island or lower cabinets.
- Use a simple color wheel: pick one dominant tone (e.g., pale blue) and a secondary accent that’s either directly opposite (for contrast) or next to it (for harmony).
- Browse home décor blogs or Instagram hashtags (like #KitchenMakeover) to spot fresh combinations then tweak them to fit your own style.
Match Finish to Hardware and Backsplash
- Sheen matters: semi-gloss or satin finishes stand up to daily spills and wipe clean easily, while a matte finish offers a soft, modern look but can show marks more readily.
- Coordinate metal tones: if you have brushed brass pulls, a warm undertone in the paint (think creamy ivory) will tie everything together.
- Look at your backsplash’s dominant color or pattern pull a subtle shade from tile grout or veining to create a cohesive palette.
By sampling in your actual space, leaning on small trends, and syncing sheen with hardware and backsplash details, you’ll choose a color and finish that feels both current and uniquely yours.
Preparing Your Cabinets for Painting
Getting your cabinets ready is half the battle and it doesn’t have to feel like a chore. Follow these simple steps to set yourself up for a flawless finish.
1. Remove Doors, Drawers, and Hardware
Start by taking off every cabinet door and drawer front that way you’re painting flat surfaces, not fighting hinges. Put screws, knobs, and hinges into labeled zip-lock bags so nothing wanders off. Lay everything out on a covered table or saw horses, and snap a quick photo of each cabinet before you pull it down. That photo will be a lifesaver when it’s time to reassemble.
2. Clean or Degloss vs. Sand
Once everything’s off, give each piece a good scrub. A mix of mild dish soap and warm water will cut through grease better than you think. Rinse and let dry. Now decide: is the old finish shiny or slick? If yes, you can lightly sand with 120-grit paper just enough to rough it up, not remove it entirely. If you’re short on time or your cabinets aren’t super glossy, a liquid deglosser sprayed on and wiped off will do the trick without all the elbow grease.
3. Skip Sanding When You Can
Not everyone loves sanding, and you don’t always need to. If your cabinets are in good shape (no deep scratches or peeling), reach for that deglosser. It chemically etches the surface so your primer grabs on and you’ll skip dusty sanding sessions. Just follow the product instructions: wipe on, wait the recommended few minutes, then move straight to priming.
4. Apply Primer for Lasting Adhesion
Primer is your insurance policy against peeling and uneven coverage. Using a high-adhesion bonding primer, roll a thin, even coat over every flat area and brush into corners and crevices. Let it dry fully (check the can for exact times), then give it a light sand with 220-grit paper. Wipe away dust with a tack cloth, and you’re ready for paint. Taking the extra minute here means fewer touch-ups later and a finish that lasts.
With everything cleaned, deglossed or sanded, and primed, you’ll breeze through the painting stage and end up with cabinets that look professionally done.
Step by Step Painting Process
Follow these friendly, hands-on steps to turn your prepped cabinets into a finished showpiece:
1. Sand or Degloss Surfaces
Give each panel a light pass with 120-grit sandpaper or wipe on your liquid deglosser.
Focus on areas where primer might otherwise slide off corners, edges, and any glossy spots.
Tip: Wrap sandpaper around a block for steady pressure and even coverage.
2. Wipe Down with a Tack Cloth
After sanding or deglossing, dust settles everywhere. One swipe with a tack cloth picks up the fine grit that sneaks into corners.
Don’t skip this step any leftover dust can show up as bumps in your paint.
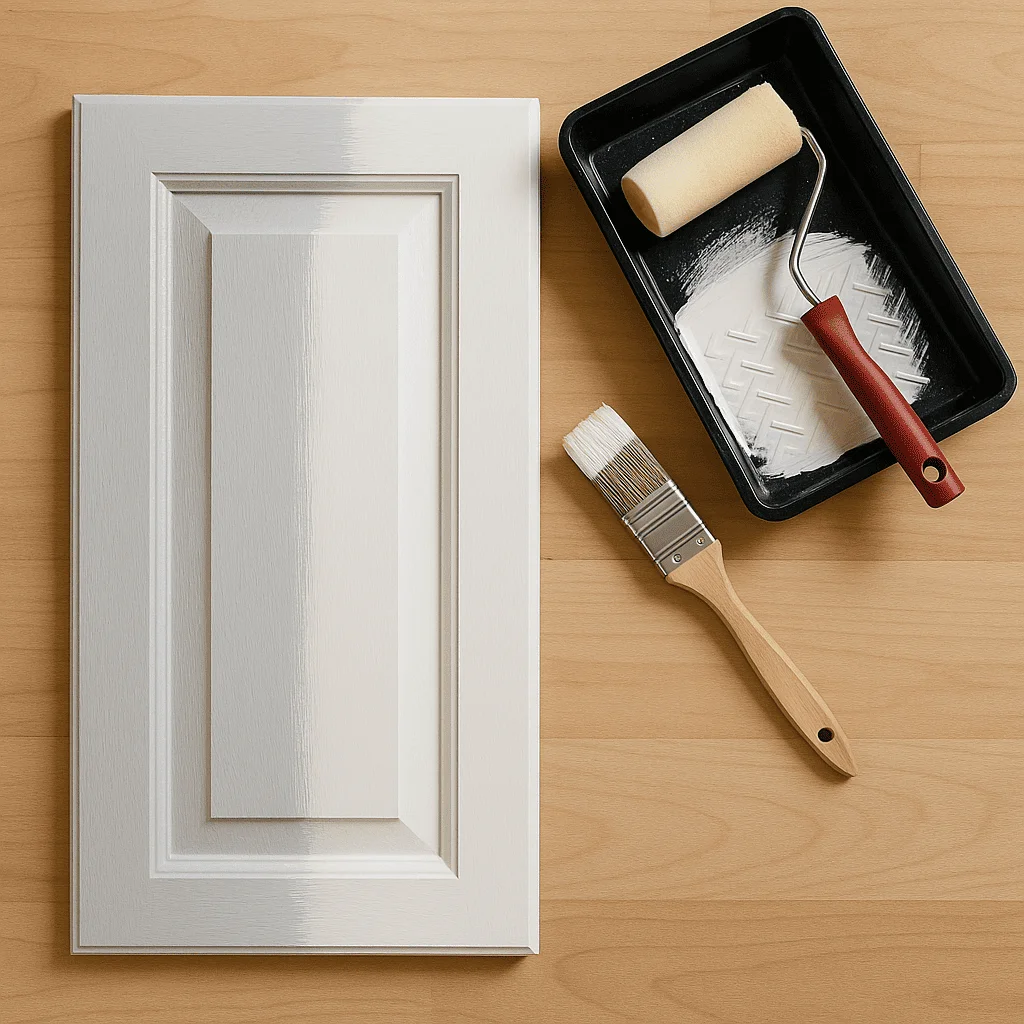
3. Apply Your First Coat
Using your angled brush, cut in along edges and grooves; then switch to a foam roller for flat areas.
Roll in one direction, then lightly “back-roll” (roll across your initial strokes) to smooth out roller lines.
Working in thin, even coats prevents drips and helps the paint dry faster.
4. Lightly Sand Between Coats
Once the first coat feels dry to the touch (check your paint can for dry times), give it a gentle buff with 220-grit sandpaper.
Wipe away dust with your tack cloth again this creates a slightly rough surface so the next coat grips better.
5. Apply Second (and Third) Coat
Repeat the brush-then-roller routine, back-rolling each time for a factory-smooth finish.
A second coat often does the trick, but if you notice any thin spots or wood grain showing, add a thin third coat.
6. Let Dry and Reassemble
Allow your cabinets to cure fully usually 24–48 hours before handling.
Refer to the photos you snapped earlier as you reattach doors, drawers, and hardware.
Stand back, admire your handiwork, and celebrate a weekend well spent!
Advanced Decorative Finishes and Techniques
Ready to go beyond a single coat? These easy, creative touches will turn your cabinets into a custom focal point no professional skills required.
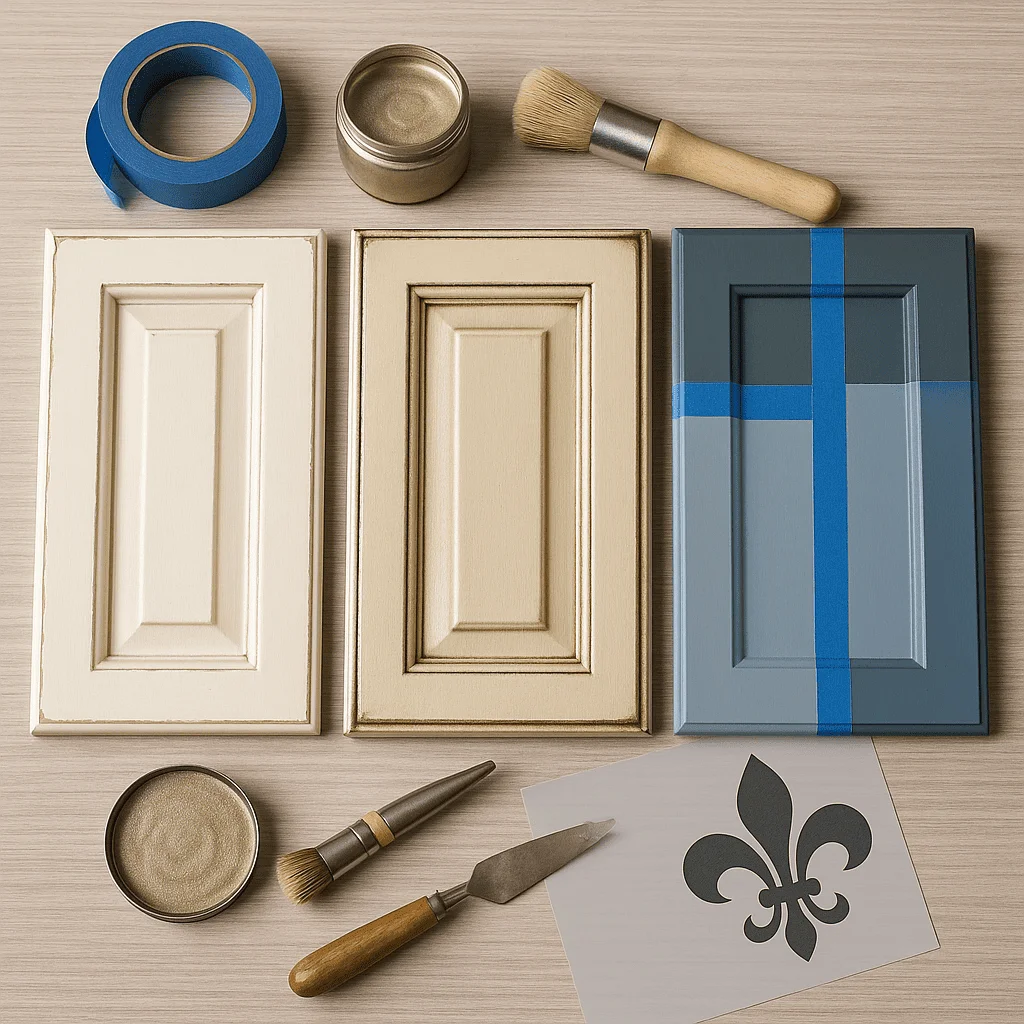
Glazing and Antiquing for Depth
Mix a clear glaze with a bit of matching paint (follow the glaze label for ratios).
Brush glaze into grooves, corners, and panel details.
Wait a few minutes, then gently wipe off the excess with a clean rag this lets the paint settle in low spots for that softly aged, “lived-in” look.
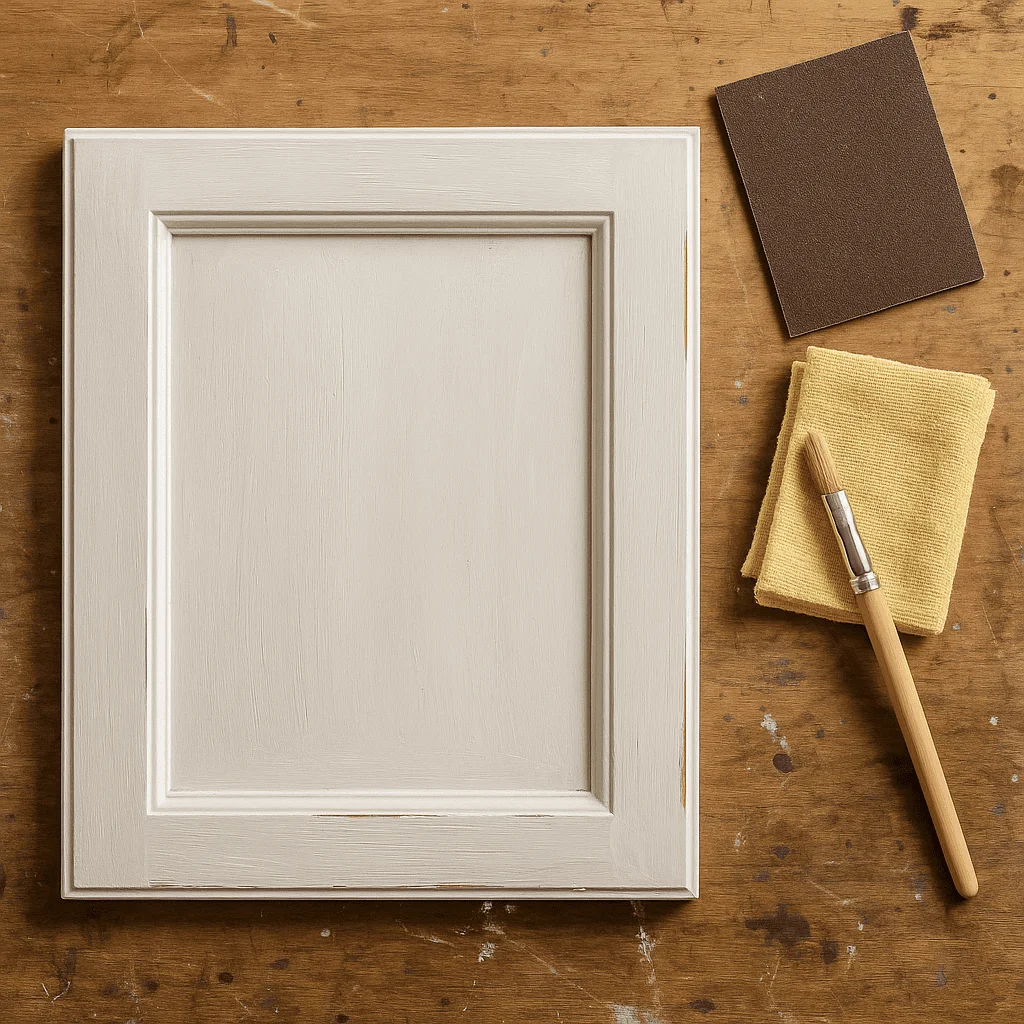
Distressing and Edge-Highlighting
Once your paint is fully dry, use fine sandpaper or steel wool to lightly rub edges and corners where natural wear would occur.
Focus on high-touch areas around handles, door edges, and drawer fronts to mimic real knock-and-grab wear patterns.
For a subtle highlight, dip the edge of your brush into a touch of contrasting paint (lighter or darker than the base), then sweep it along bevels and trim lines.
Two-Tone Cabinet Designs
Choose two complementary colors popular pairings include crisp white uppers with a deep navy island.
Paint and fully cure the first color before taping off sections for the second.
Use high-quality painter’s tape and a smooth-foam roller to keep the dividing line sharp. This creates visual interest without adding complexity.
Metallic Accents and Stencil Details
Select a small area like a toe kick strip or inside display cabinet and brush on a thin metallic paint (brushed bronze, antique gold, or pewter look great).
For a patterned touch, secure a stencil to a flat door panel with low-tack tape, then gently pounce stencil paint using a sponge brush.
Peel the stencil off before paint fully dries to avoid snagging edges, then lightly feather around it for a fade-out effect.
Troubleshooting Common Painting Problems
Even the best-laid painting plans can hit a few snags. Don’t worry you can smooth them out in no time with these simple fixes:
Fixing Brush Marks and Roller Lines
If you spot faint lines from your brush or roller, let the paint dry fully (at least 24 hours). Then lightly buff the area with 220-grit sandpaper, just enough to knock down the ridge. Wipe away dust, and apply a very thin “dry” touch-up coat load your roller or brush sparingly and roll in long, steady strokes, back-rolling to blend.
Dealing with Drips, Runs, and Bubbling
Caught a drip while painting a tall cabinet? Wait until it’s fully dry (this stops smearing), then sand the bump flat with 220-grit sandpaper. For bubbling (tiny pinpricks where air got trapped), sand the area smooth, clean with a tack cloth, and repaint that spot with a light, even coat.
Correcting Uneven Coverage or Lap Marks
Lap marks look like darker streaks where one section dried before the next coat overlapped. To fix, sand the transition area very gently, wipe clean, and repaint that whole panel in one continuous pass start at the top edge and work straight down with a consistent speed, keeping a wet edge.
Quick Touch-Up Hacks
- Mini detail brush: Keep a small artist’s brush on hand for tight corners or grooves you’ll blend touch-ups invisibly.
- Sample pot practice: Before tackling visible spots, try your touch-up on a cabinet’s inside edge to match sheen and color.
- Blend with clear sealer: After your paint fully cures, a thin coat of clear polyurethane can help even out slight sheen differences between patches and original finish.
By tackling these hiccups patiently drying first, sanding gently, and feathering in new paint you’ll keep your cabinets looking crisp and polished, just like a pro’s work.
Post Paint Maintenance and Care
Your cabinets are looking fresh and with a little regular TLC, they’ll stay that way for years. Here’s how to keep your paint job shining:
Gentle Cleaning for Daily Life
Wipe spills right away. A quick swipe with a damp microfiber cloth and a drop of mild dish soap prevents grease and stains from settling in.
Skip harsh chemicals. Stick to gentle cleaners anything with ammonia or abrasive scrubbers can dull the finish over time.
Dry as you go. After cleaning, buff surfaces with a soft, dry cloth to remove any lingering moisture.
Spotting and Repairing Scratches or Chips
Do a monthly once-over. Open and close doors, peek under handles, and look at corners to catch tiny nicks before they grow.
Touch up with care. Lightly sand around the chip with fine-grit paper, wipe away dust, then use a small artist’s brush to dab on matching paint. Feather the edges so it blends seamlessly.
Seal quick fixes. Once dry, add a hair-thin coat of clear sealer over the repaired spot to protect your work and match the surrounding sheen.
Re-Sealing and Wet-Sanding for Long-Term Durability
Refresh the topcoat annually. A fresh layer of clear polyurethane keeps moisture and grease at bay. Lightly wet-sand cabinets with 400-grit paper first just enough to create “tooth” for the new sealer.
Clean before you seal. After wet-sanding, wipe every surface with a tack cloth to lift dust, then roll or brush on your sealer in thin, even coats.
Let it cure. Give it a full 48 hours before heavy use. The extra wait pays off in a finish that resists chips and stays easy to clean.
FAQs
How long should I wait between paint coats?
Aim for at least 2–4 hours between coats with most latex paints, or up to 24 hours if you’re using oil-based products. Always check the can’s recommended dry time, lightly touch a hidden corner to make sure it’s not tacky before you sand or apply the next coat.
Can I skip sanding and just use a deglosser?
Yes! If your cabinets aren’t in rough shape or peeling, a liquid deglosser will etch the finish enough for primer to stick. It’s cleaner and faster than sanding, but if you notice flaking or deep scratches, a light sanding with 120-grit paper is still best.
What’s the easiest way to preview cabinet colors?
Tape up small swatches or sample-pot patches on different cabinet faces. Live with them for a full day morning light versus evening glow can change how the hue reads. You can also try free digital visualizer apps from Benjamin Moore or Sherwin-Williams to virtually “paint” your kitchen before you buy.
Which paint type is best latex, oil-based, or chalk?
Latex: Dries quickly, cleans up with water, and resists yellowing perfect for most kitchens.
Oil-based: Ultra-durable and levels out nicely, but requires mineral spirits to clean brushes.
Chalk paint: No sanding needed and gives a matte, vintage look; just topcoat with clear sealer for protection.
How do I reduce paint fumes and choose eco-friendly options?
Look for low-VOC or zero-VOC formulas labeled “green certified.” Open windows or run a small fan to increase airflow, and wear a basic mask if you’re sensitive. Many brands now offer sustainable lines that match the performance of traditional paints.
What if I get drips or brush marks can I fix them?
Absolutely. Let the paint dry fully, then sand the imperfection smooth with 220-grit paper. Wipe with a tack cloth and apply a thin “dry brush” touch-up: barely load your brush or roller, feathering strokes to blend into the surrounding finish.
How do I keep my cabinets looking fresh long-term?
Wipe spills right away with a soft cloth and mild soap. Do a quick monthly check for chips—sand the spot lightly, dab on matching paint with an artist’s brush, and seal with a thin coat of polyurethane. An annual wet-sand and reseal helps maintain that showroom sheen.